diy restoration hardware paper mâché bowl


I’ve been eyeing these paper mâché bowls from Restoration Hardware (and the like, McGee & Co, Etsy) for a while now, and while, I’m obsessed with the look, the price tag is absolutely absurd. I’ve seen these bowls retail from $50 to $400 a piece! Um, excuse me? This piece screamed DIY-able and I absolutely had to try to recreate it. It became a challenge at this point, ha!
Inspiration from McGee & Co and Restoration Hardware


HOW TO MAKE A PAPER MACHE BOWL
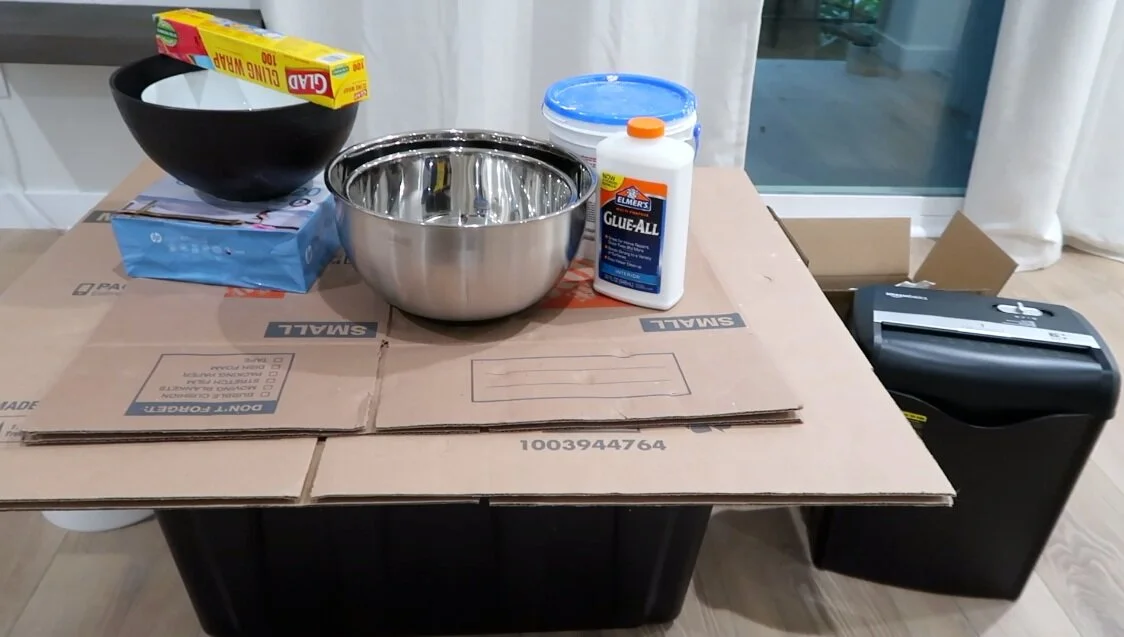
You’ll need a list of basic supplies to make these bowls. Most of the items you probably have around your home. I only had to pick up a few things (glue and paint) and spent around $20. Luckily wrapping up renovations I still had joint compound!
SUPPLIES NEEDED
Paper Shredder or Scissors
White Glue (Elmer’s Glue-All)
Flour
A Couple of Mixing Bowls (large)
Blender (I used a NutriBullet)
Strainer or Nut Milk Bag (I highly recommend the nut milk bag)
Saran Wrap
Bowl of choice for mold
Paint - off-white and brown/beige colors
RECIPE
Per approx 12″ wide bowl:
9 cups shredded wet paper
3 cup drywall joint compound
1 cup white glue
1/2 cup white flour
*I originally found the recipe here and modified it a bit


STEP 1:
If you don’t have a paper shredder, you’ll have to cut the paper with scissors. I used plain printer paper which still turned out kind of blue. I knew I’d be painting mine, so it wasn’t a big deal. So if you’re going to paint as well you can use any old paper (newspaper, paper already left over in the shredder, etc.).

STEP 2:
Place the shredded paper in a large bowl and cover with boiling water. You’ll be able to add more paper and water as the paper starts to pack down. I left it to soften for about 30 minutes so that the paper is super easy to pull apart.
STEP 3:
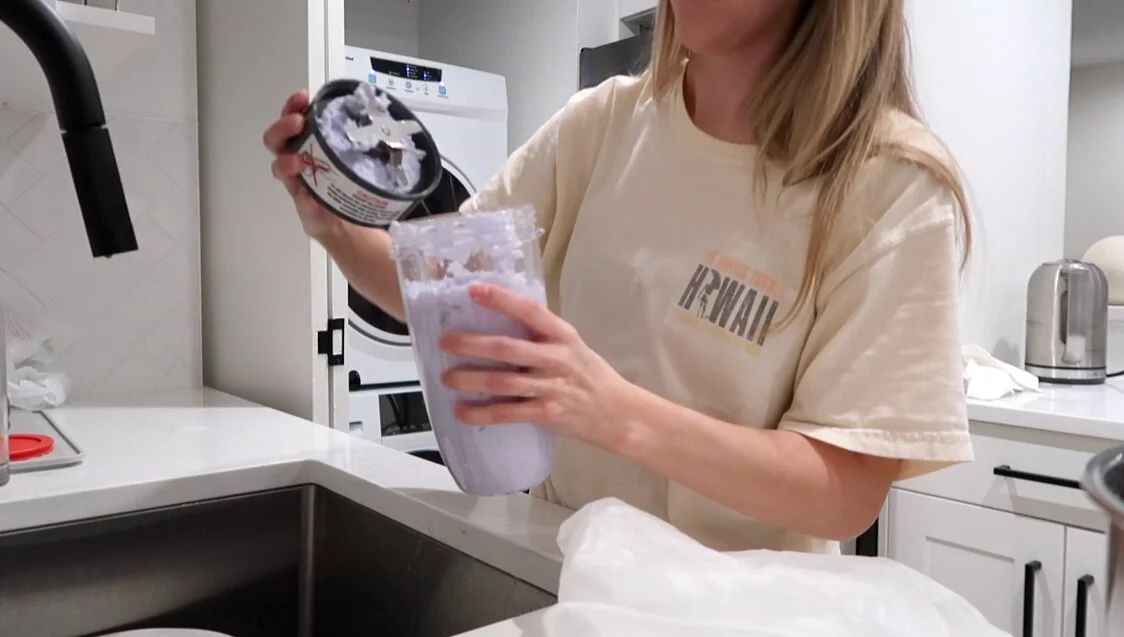
In batches, you’ll start to process the paper in the blender. I used a NutriBullet and was able to process 2 cups at a time. Make sure you add more water in with the paper so that the blender doesn’t get bogged down. And don’t worry about the excess water, it’ll get strained out.

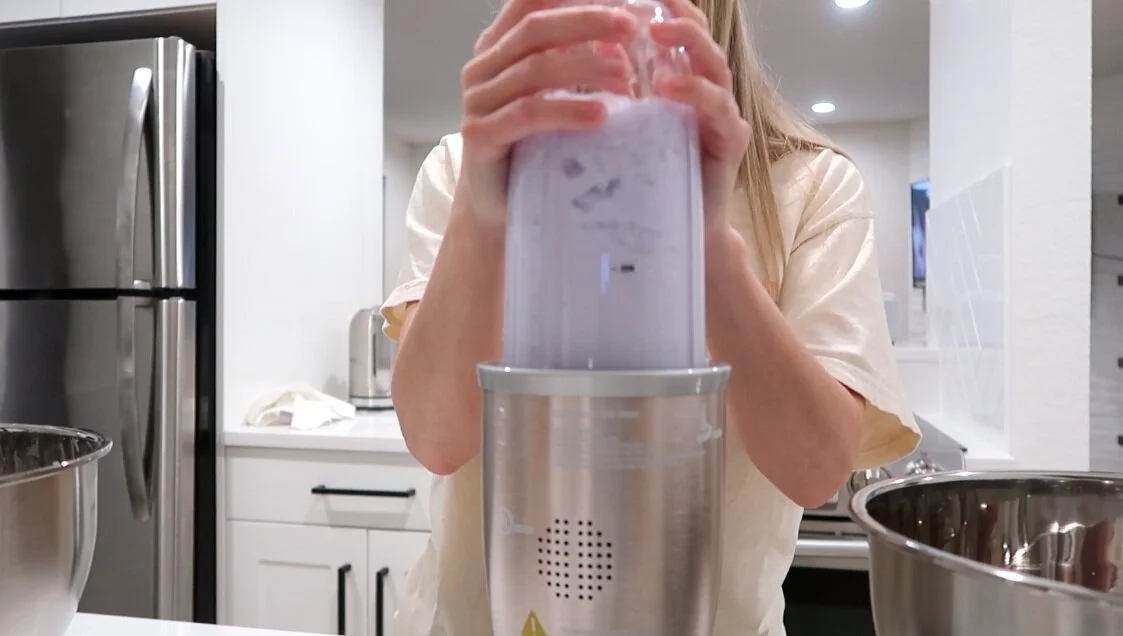
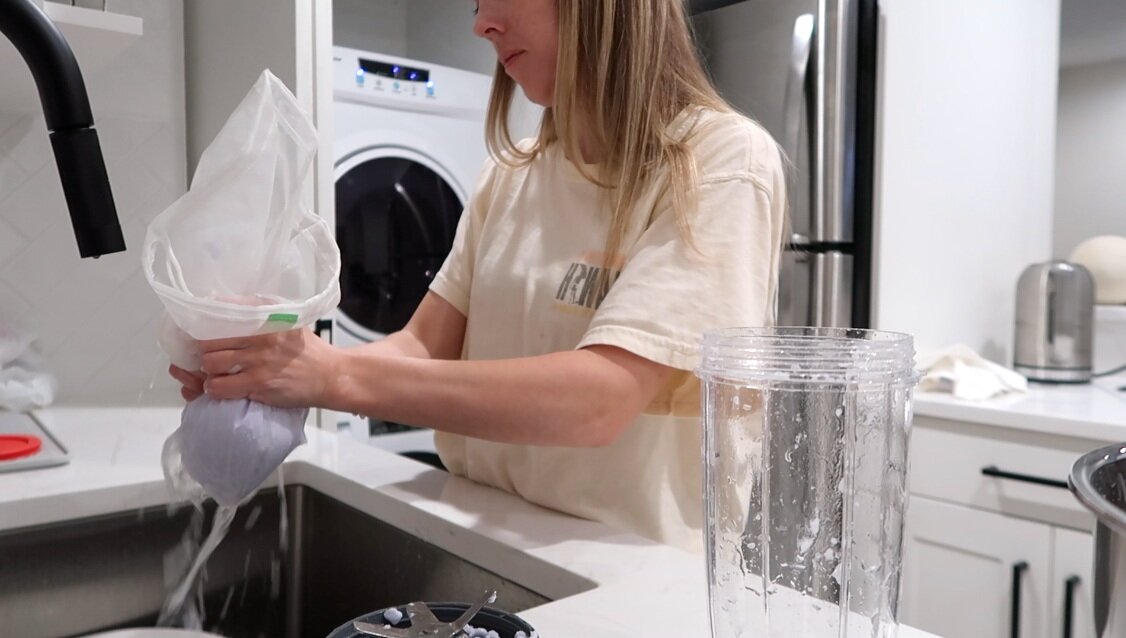
STEP 4:
I moved the blended paper into a nut milk bag to squeeze out the excess water. This is by far the best method I found and easier than a strainer. You want the paper to be slightly damp, but still have a crumbly texture. If you dry it out too much, it won’t stick together when you start to assemble on the mold.
STEP 5:
Prepare your work surface with builder’s paper, cardboard (whatever you have on hand) to keep your counters or dining table clean. For each bowl, make sure you have an extra piece of parchment paper/aluminum foil to place the bowl onto. This will ensure it doesn’t stick to the cardboard while drying, but also helps to rotate the bowl.
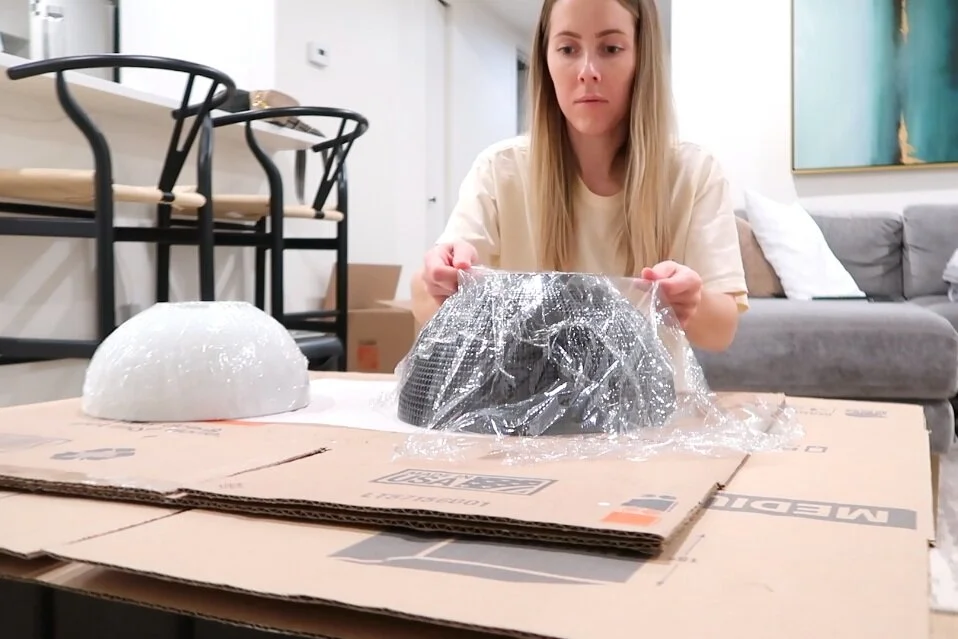
STEP 6:
Oil the bottom side of the bowl and then tightly cover with plastic wrap. The oil helps the bowl to be removed easily once the outside of the paper mâché has dried.
STEP 7:
Add the drywall joint compound, glue, and flour into the bowl with the crumbly paper. Mix well with your hands.
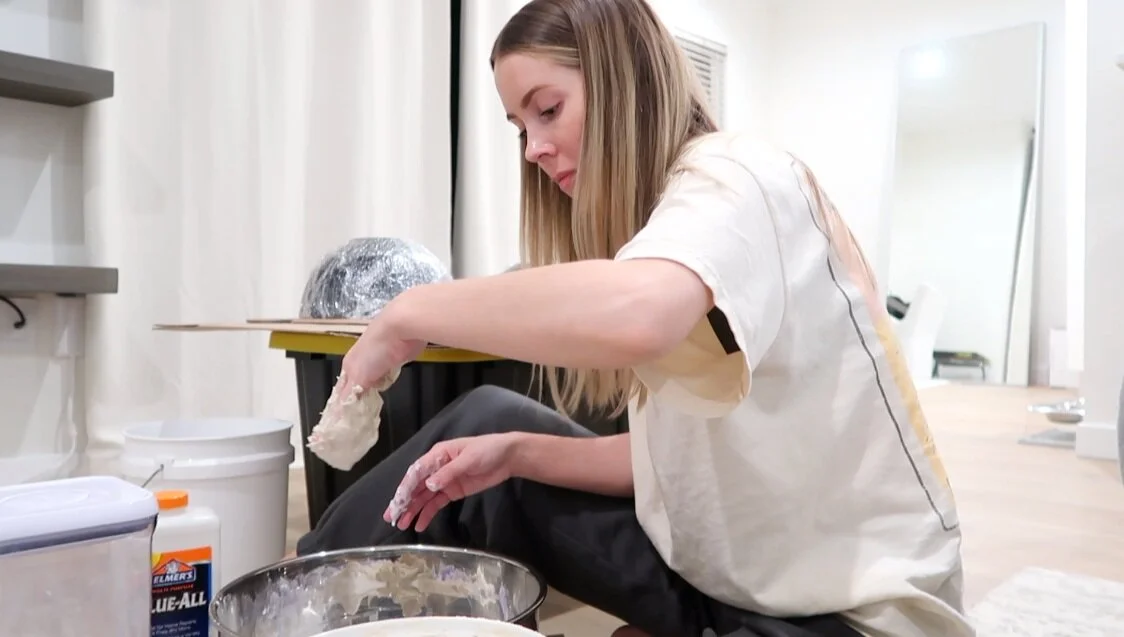
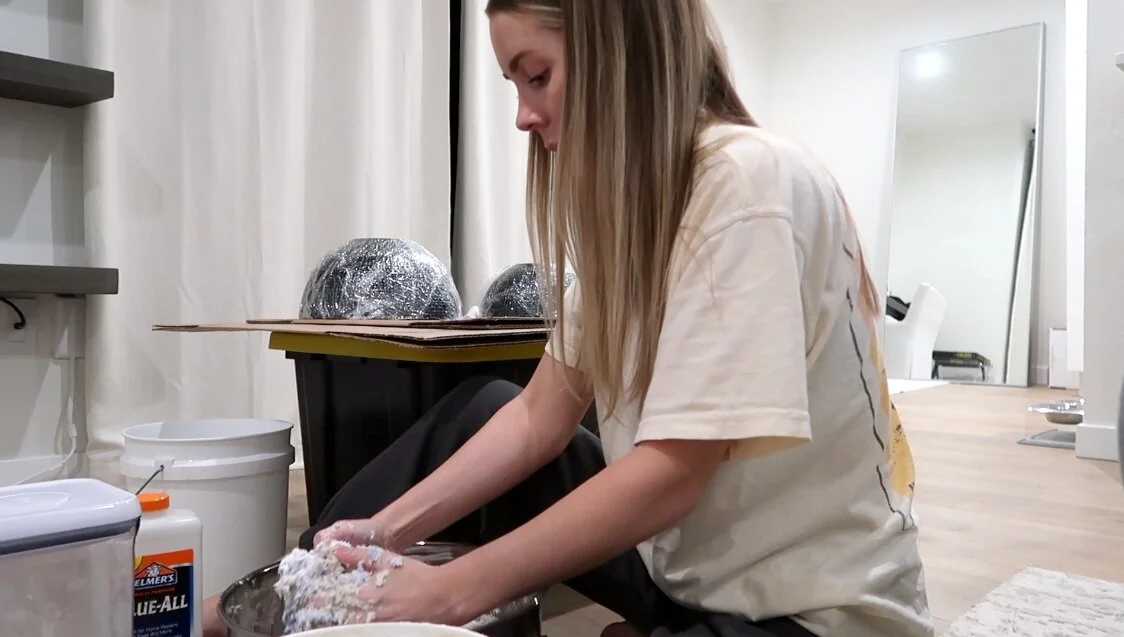
STEP 8:
Start to press the mixture onto the prepared bowl, adding a foot and rim if desired. Let it be organic! The bumpy texture and unevenness is what makes each piece unique.
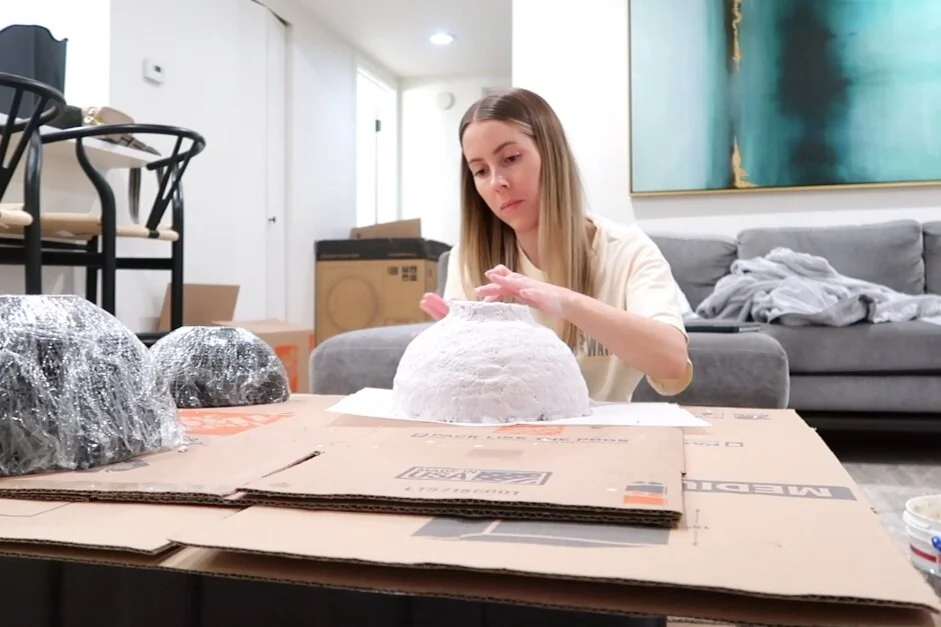
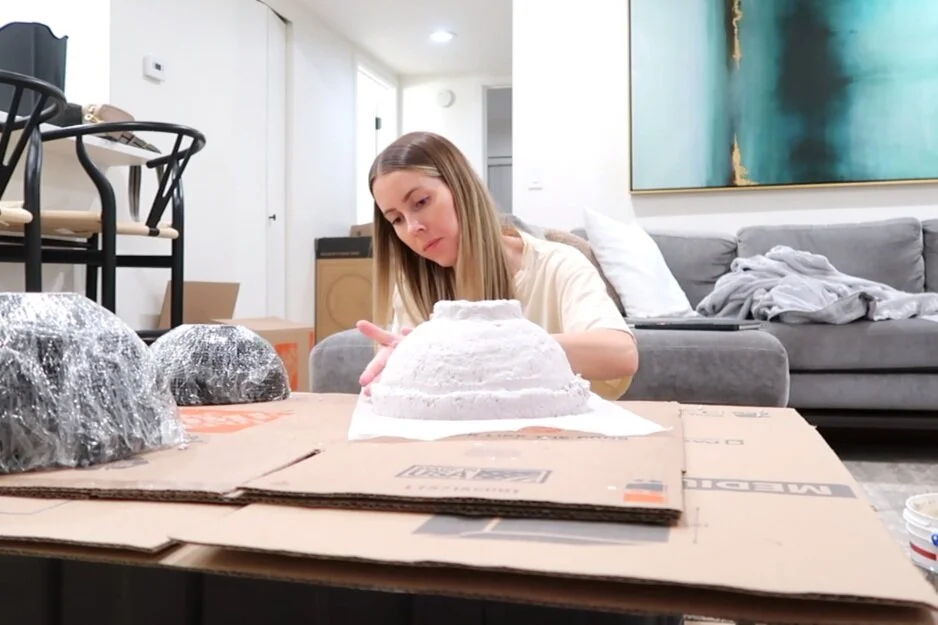
That’s it! You did it!
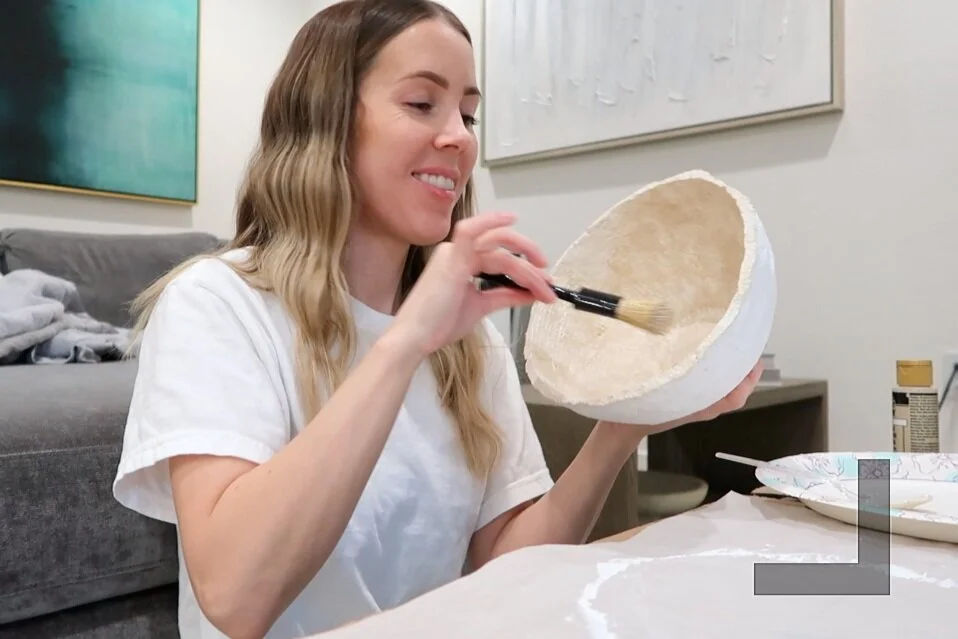
Now leave to dry! Mine took a full 7 days to dry out. After 2-3 days the outside should be dry and time to invert the bowl and remove the the mold. Remove the plastic wrap and continue to rotate each day to allow to dry completely.
PAINTING YOUR PAPER MACHE BOWL

To achieve a similar look to mine, first paint the bowl fully with a white paint. I used leftover ceiling paint from my renovations. Just make sure it’s a flat/matte color.
Once dry, I used a stippling brush to sparingly dab on 3 different colors of paint. You can use a sponge or other material you find works similarly.

The paint colors I used (picked up from Micheals) are below and all matte:
Craft Smart ‘Tan’
Folk Art ‘Linen’
Craft Smart ‘Suede’
Folk Art ‘Vintage White’
I used Tan and Suede on their own; however, ended up mixing Tan and Vintage White together to create a creamy white (1 part Tan to 5 parts Vintage White) as my third color on 2 of the bowls and the vase. I also mixed Linen with Vintage White (1 part Linen to 2 parts Vintage White) as the third color on 1 of the bowls.
I applied from the darkest color moving my way to the lightest. Each super thin layer dried almost immediately so it was easy to just keep adding the layers on top. I just used 1 paint brush.
I can’t stress it enough to go in with a super light hand and spread all the paint out before re-dipping your paint brush. I also found it best to leave the depressions in the surface white to create variety to the finish. The multiple colors I used helped to create more dimension, depth, and overall a more realistic look.

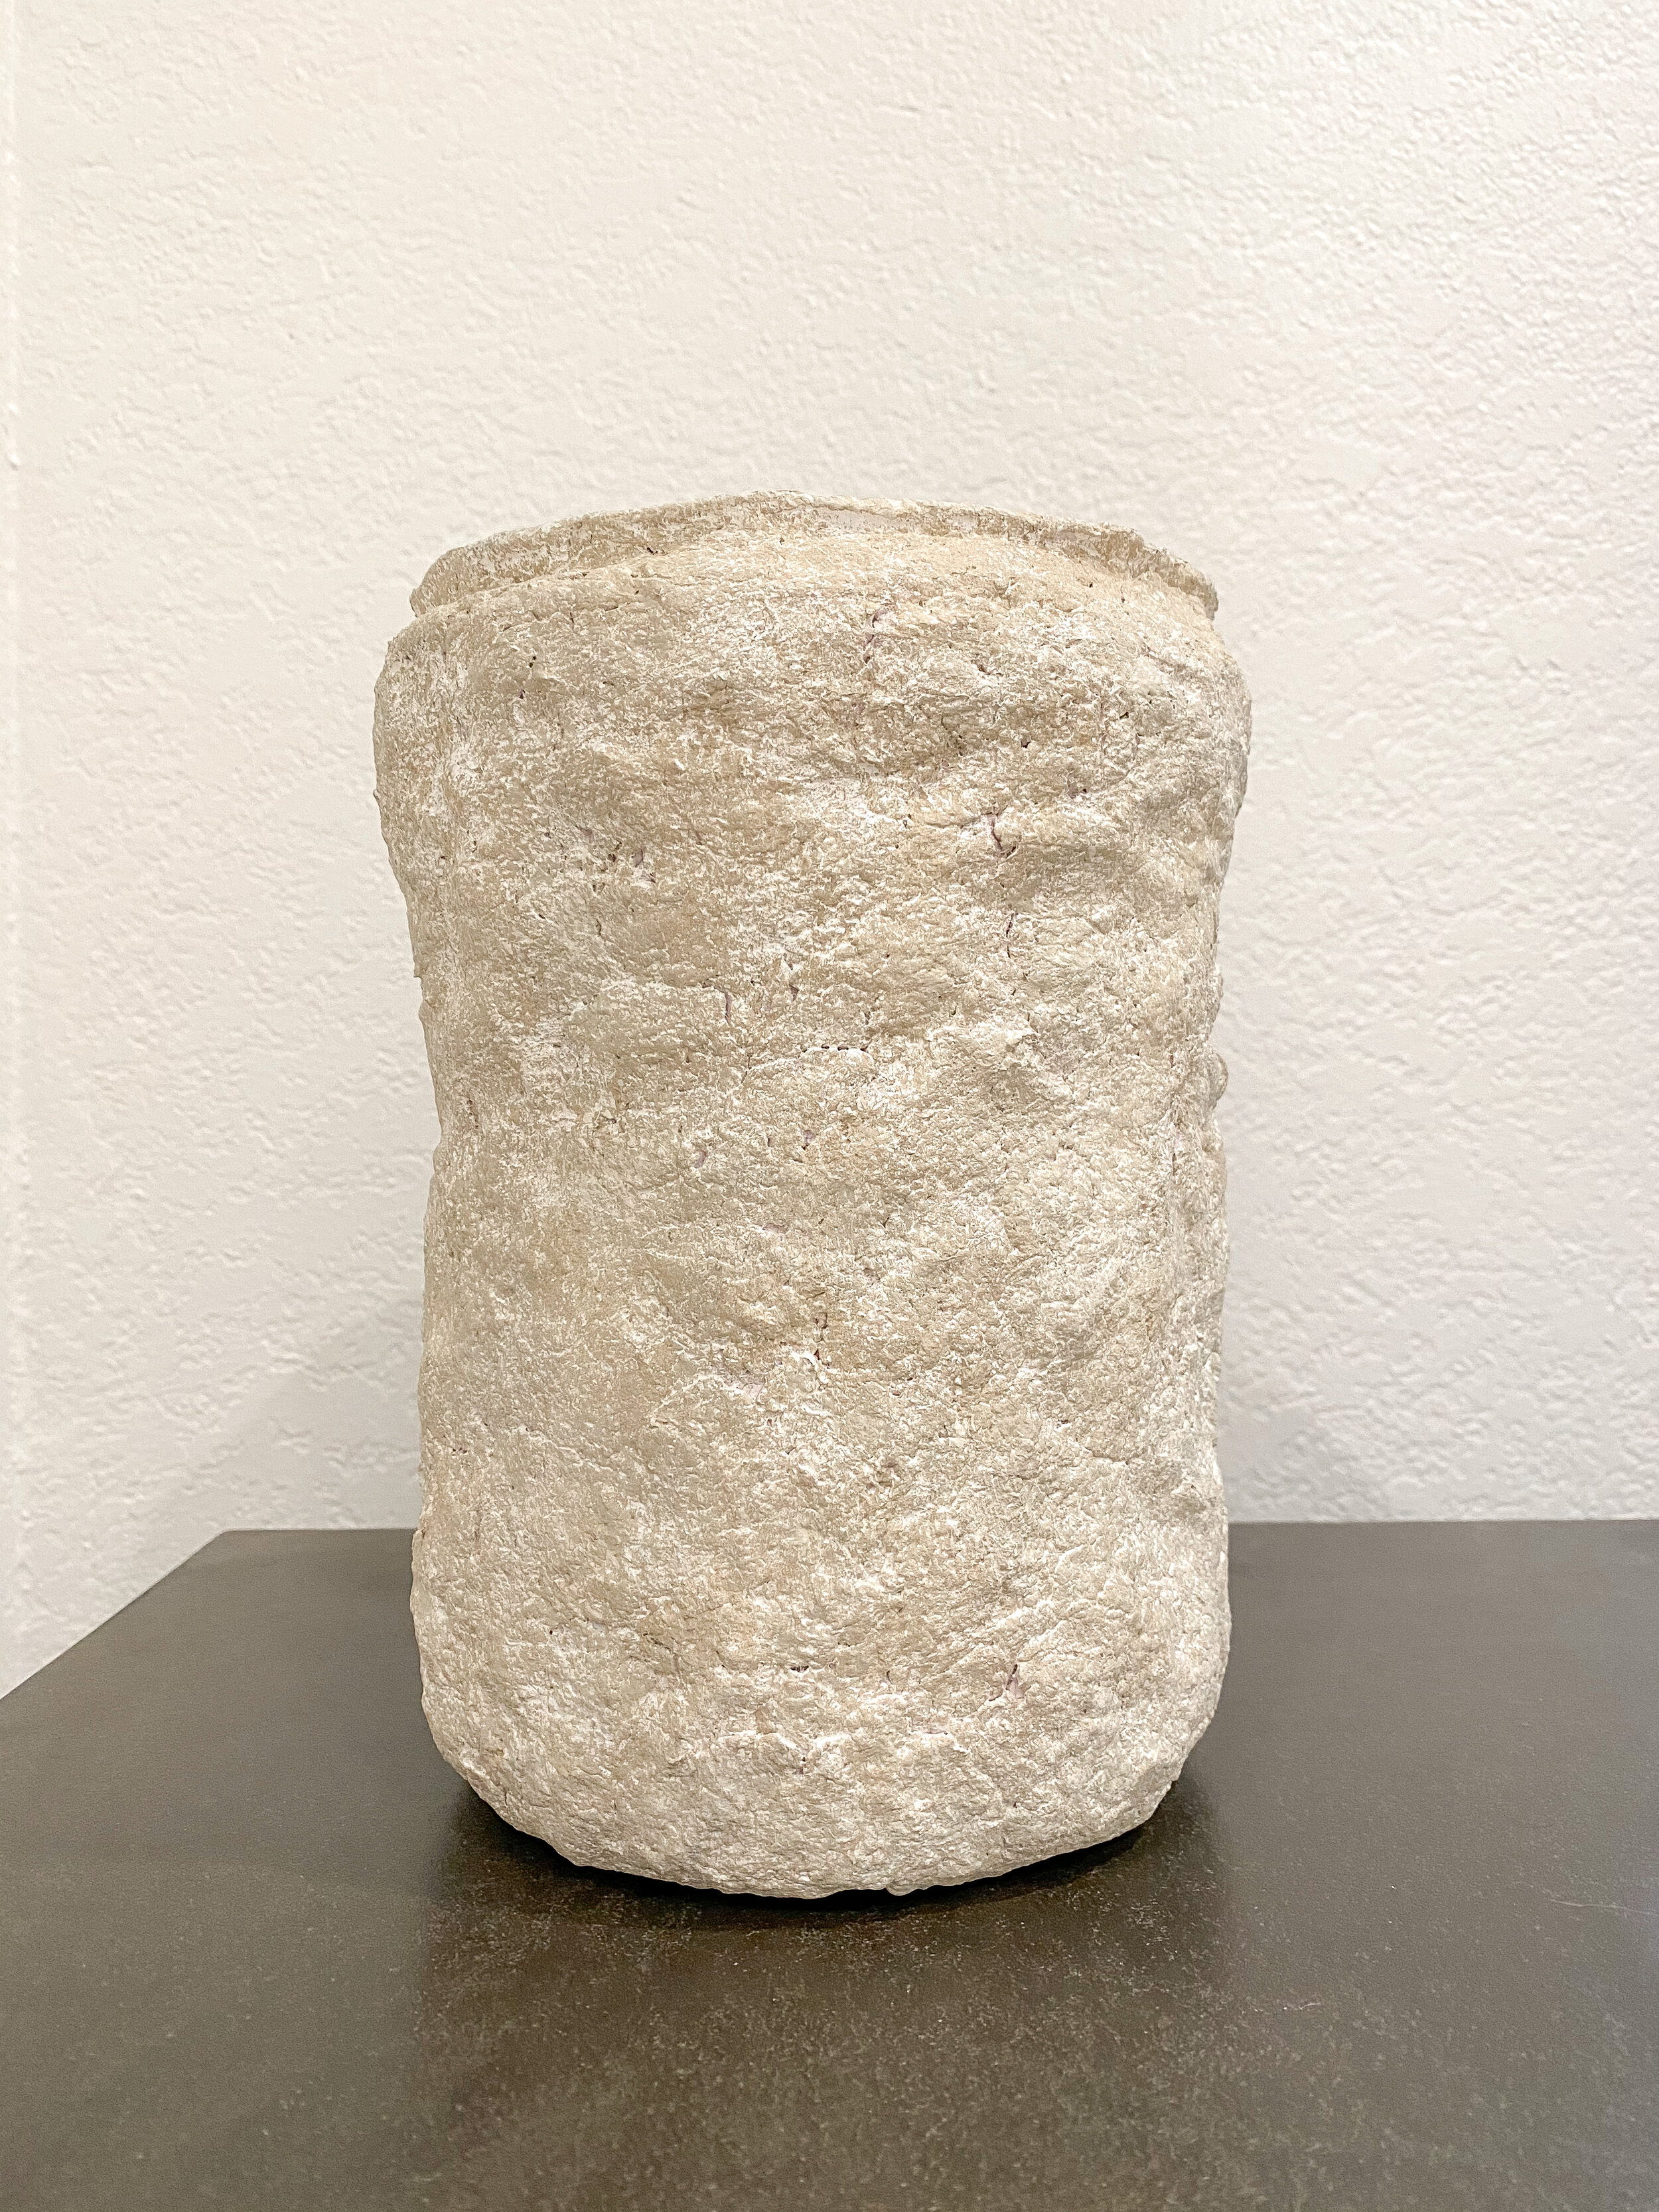
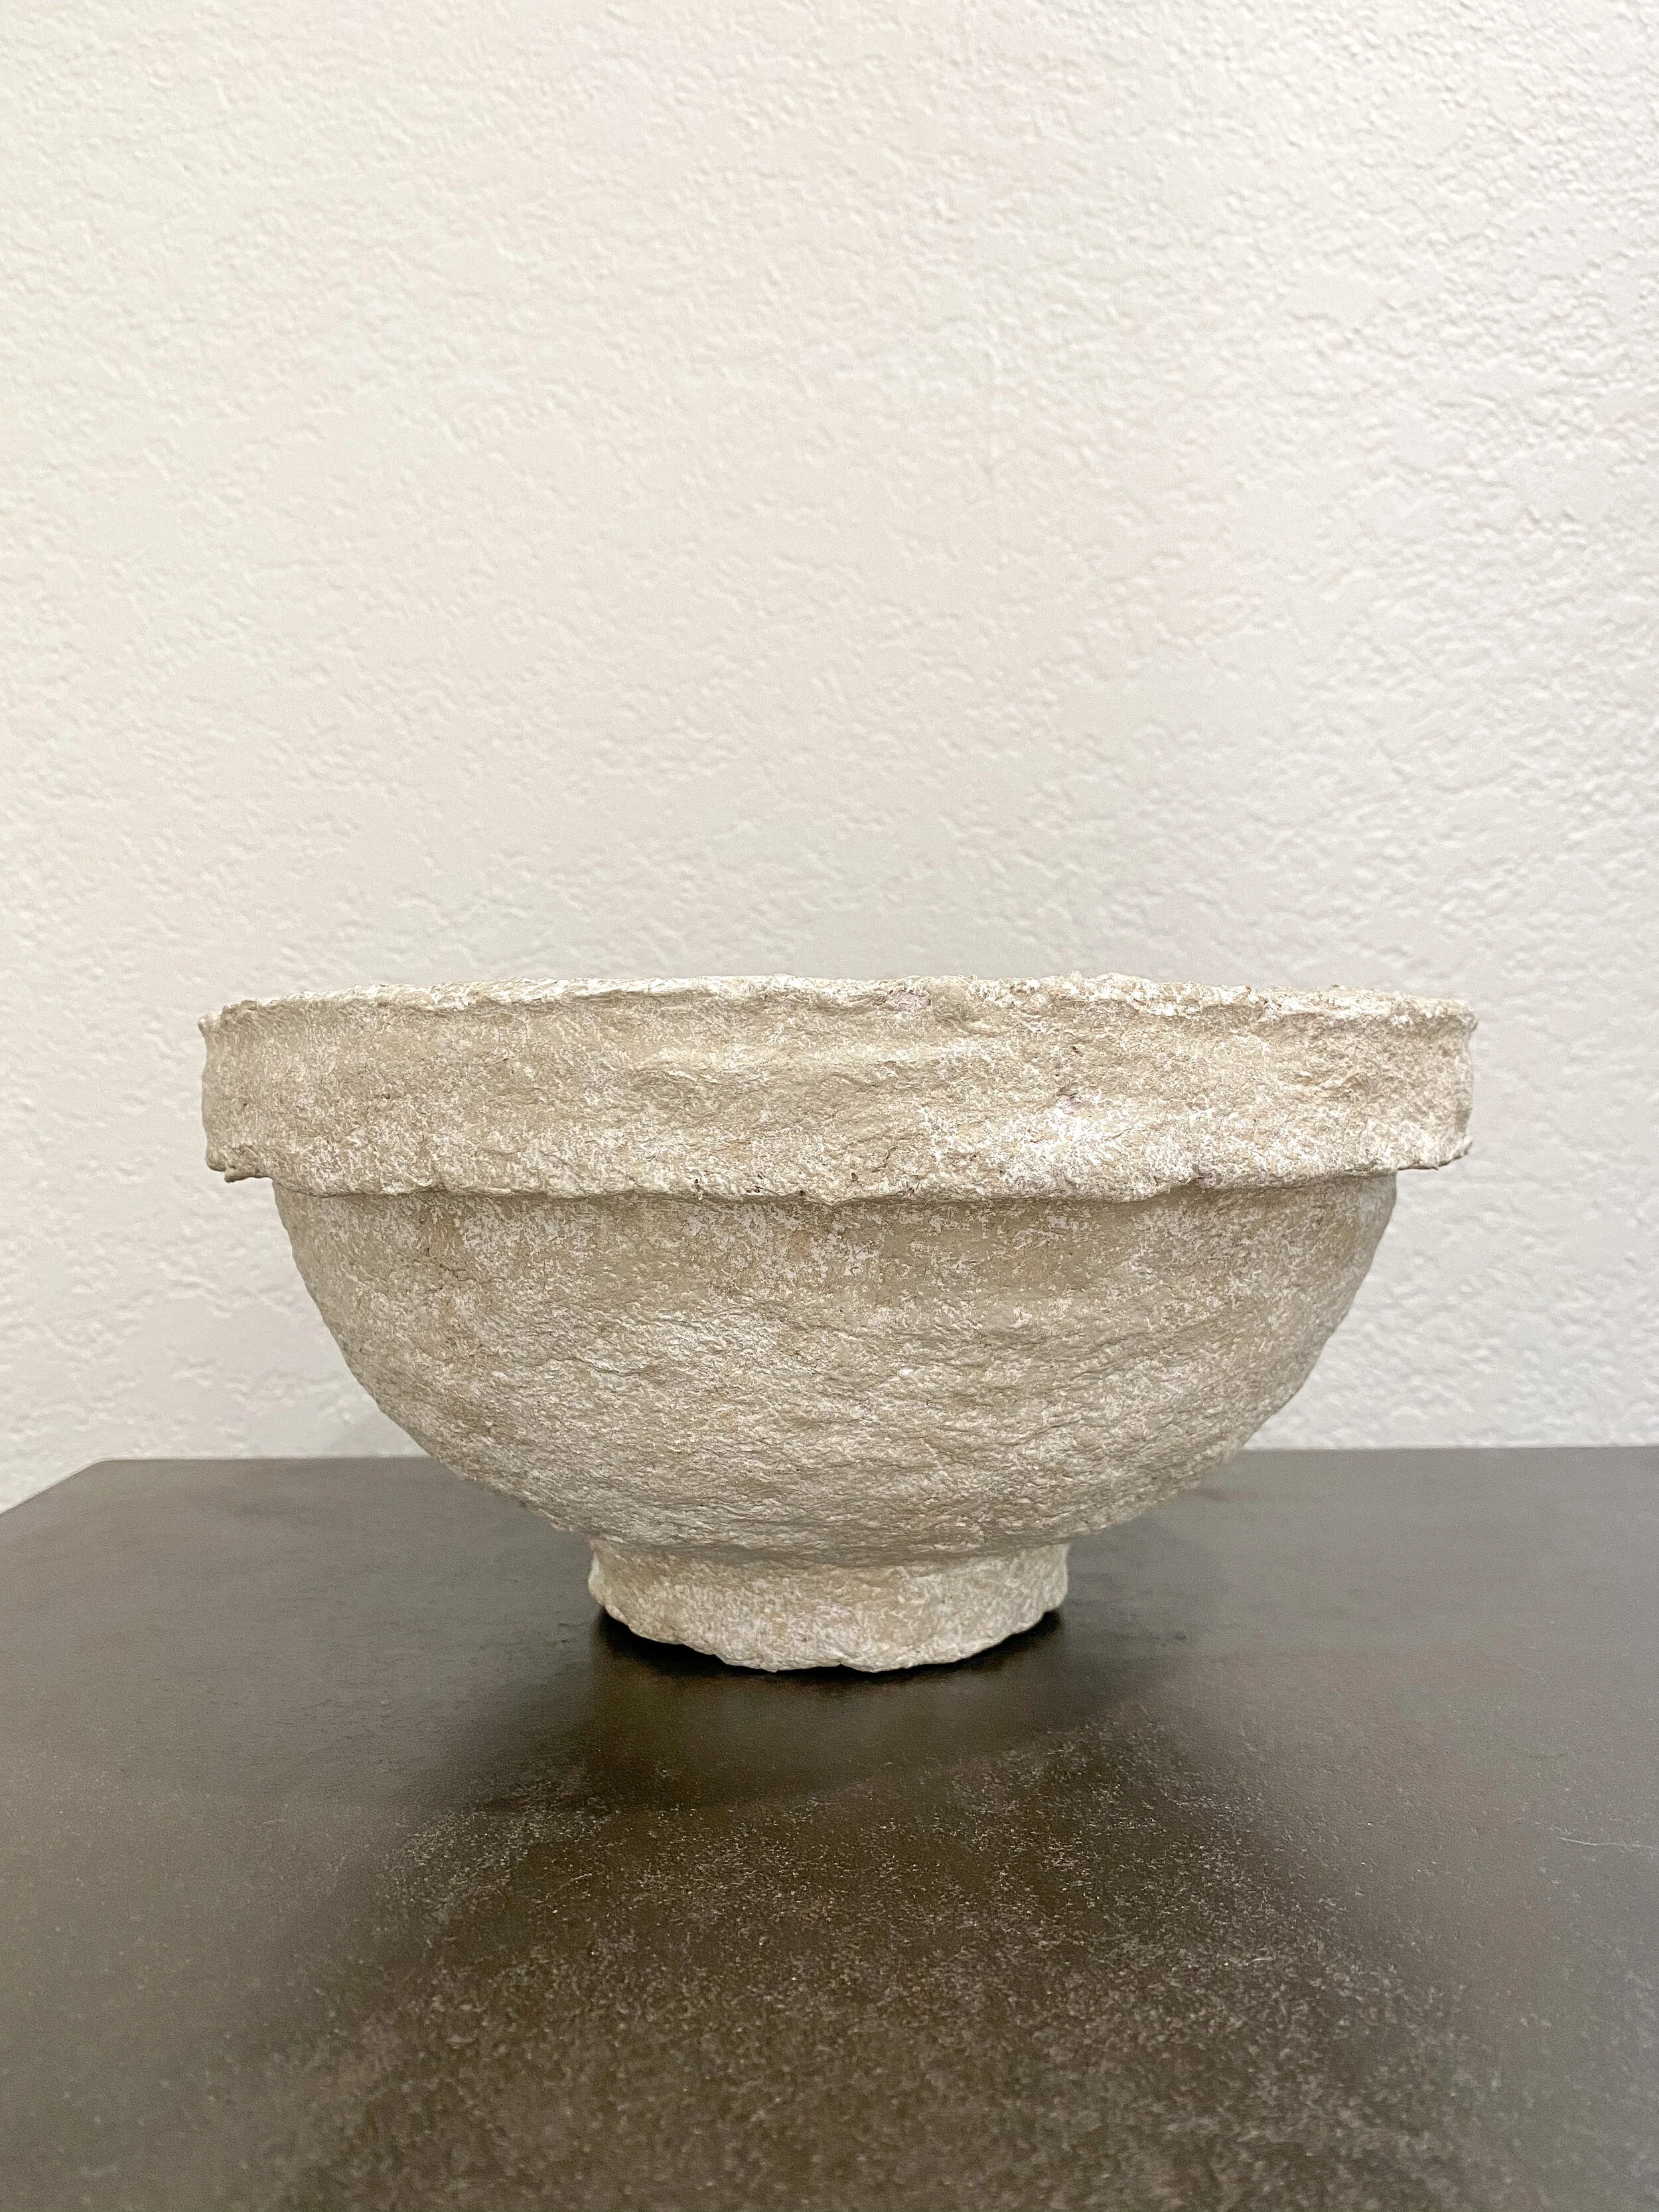
FINISHED BOWLS
While I kept the colors on all the bowls fairly similar, go wild! Go lighter, go darker! I love that each has it’s own look; with and without a rim, with and without a foot - create bowls and vases in different sizes with unevenness and texture!


STYLING YOUR PAPER MACHE BOWL
Once dry, your bowl is ready to be styled! Keep in mind this is not food safe and can’t be washed. It would of course make for a beautiful addition in a kitchen on open shelving or on the island. I’m thinking of bringing a couple over to Juan’s house. Alternatively, I love it placed on top of a few stacked coffee table books. You can also allow it to stand alone too! You honestly can’t go wrong. It makes a statement on its own.


Congrats babes! You just made the item for less. Now go spend the money on lululemon ;)
xx carissa
This post may contain affiliate links, and I may earn a small commission at no additional cost to you. If you choose to shop through my links to purchase that item, you’re support me and thank you x`1000.